This post originally appeared at Top Tip Tuesday for our Spring Cleaning challenge and I added a follow-up post with more pictures later. I thought it would be fun to revisit this post for Sunday Favorites over at Happy to Design and because my studio looks nothing like this right now. Clearly some gremlin came in and tossed things about so that there are no clean surfaces. LOL!
Greetings Tippers! It's Moriah here (aka Fuzzy Slippers) and I've done some spring cleaning in my "crafty studio". My thinking is that I'll give you a tour and briefly show you how I organize my goodies. By no means do I think this is the only way to plan your space, but it seems to (mostly) work for me. :)
Welcome to my space! (Before we go any further, yes that is a Christmas tree in my studio. I put it up for the first time this year and I adore holiday lights so much I refuse to take it down. LOL!) I'm someone who needs to see what she has. Outta sight, outta mind for me, so I put all my embellies out in the open on those wooden bookshelves last spring. My hubby calls those shelves "The Store" because he says it looks like a display from my favorite shoppe.
Here's a slightly closer view of "The Store". I think in terms of color, so I organized everything in rainbow fashion. The top shelf is pink & red, then orange & yellow, 'n so on. The bottom boxes hold all my card bases and envies (yup they are rainbow sorted too! hee-hee). The tote is my "go bag" for classes. I got tired of packing and unpacking the tote, so now it's always packed and I use my tote to store my most used supplies. It sits at my feet right within hand reach for easy use.
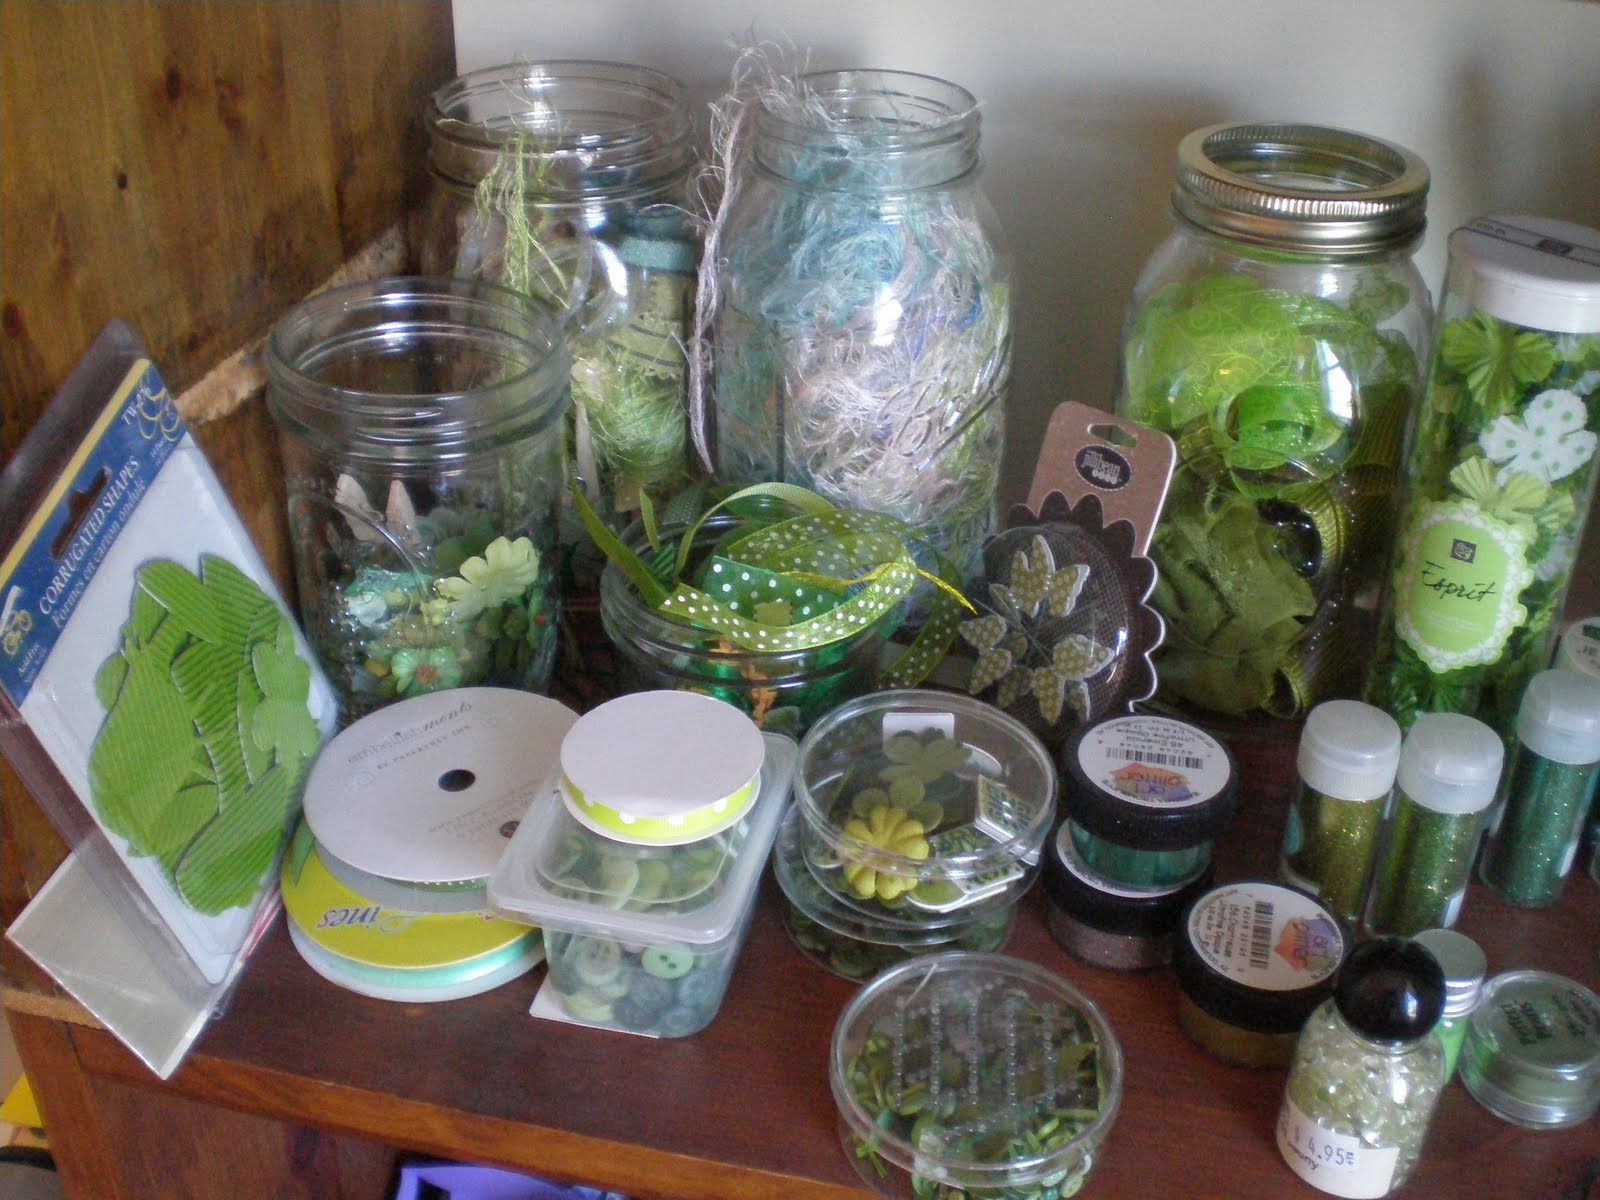
This is a close up view of the "green section". It holds all the flowers, ribbons, glitter, dew drops, buttons, & some punched stuff (I'll come back to more storage for punched stuff in a bit.)

Don't feel like you have to go out a buy "stuff" to hold your "stuff". The bookshelves that everything is stored on I got at garage sales when I was in college. The basement was raided for old jars & vases to hold my flowers and ribbons. Then I looked at all the fun packages that products I buy come in and re-purposed what I could to hold smaller embellies like brads & rhinestones. My DSIL gave me a TON of Gerber baby food plastic containers and I usually use them for buttons, although I have soooo much pink stuff I had to use an old Mason jar for the pink buttons. :) I spent A LOT of time with my Gram as a kid. She was a big I-lived-through-the-Depression-I-don't toss-what-can-be-reused kinda gal and it rubbed off on me. LOL! Note: I don't stress to much about storing by company, but that can lead to trouble when I want to get more of something. Eeek!

This is the left side of my area. The ribbon board holds both the great cards friends have made as fun inspiration and horrid creations of mine to remind me what not to do. ;) The not so pretty cardboard boxes hold my chalk inks on the far side and my dye inks on the near side. (Any tips out there for a prettier version of these boxes???). The table was a $10 thrift store find and I use it to layout stuff and to cut using my Cuttlebug. My paper is in the 12X12 boxes below the tree and inks. I'm kinda a lazy crafter, so if I can't "wheel" or "pivot" from my chair to the product, I probably won't use what I have, so it's key to have it handy!
This is a quick peek at the shelving. It's designed to be cubes, but
my husband I rigged them to hold these boxes with some cable ties.
The boxes are (say it with me) sorted by rainbow, so one box per color. I'm not good at remembering what I have, but when I put together a creation I think in color. If I have all the "pink paper" in the "pink box" then it's easier for me to find just the right pink paper to finish off the project at hand. Oh remember when I mentioned punches earlier? The zippy bag you see in this box holds punches made from die cutting or hand punches- occasionally I actually put my scraps away and the baggies keep the punched items from getting lost or ripped when I dig through for paper. LOL!

Bless your heart you are still reading my overly long post! My goodness I hope you are finding it helpful! This is my "cutting station". The hand punches are stored on towel rods and these are simple wooden ones that were on uber sale at a discount place nearby. So these were purchased, but not for much I promise. The cabinet was a "trash to treasure" find at the church Country Fair a couple years ago. It's a nice counter height for me AND it holds my rubba'.
Here's the inside of the "cutting station". I started buying Thickers to store my rubber stamps. They are easy to move around and you can see what you have in them. There are lots of preferences on how to store stamps category-wise. I tend to go by theme, like "flowers" or "baby". The baskets hold some cards that are "in progress", the green bin holds my various sized zippy bags, and the photo boxes hold my MFT and PTI clear stamp sets.
Holy cow you made it to the end of this post!!! I should have put some tricky bit of trivia in there and offered a prize for folks who made it all the way through. hee-hee! :)
I have way more pictures and idea, but goodness we could be here all day and you have a challenge to join! Like I mentioned at the start of this uber long post, my organizing is by no means the only way to go. I've blown and amazing amount of money on organizing books and magazines in the hopes of finding
The Best way and have yet to do more than lose money. ;) The best advise I have gotten is this, -quoting Star Wars here- "use the force". What does that mean? Sit in your space and think about what would make it easier for you to use and then think about the cheapest way you can make whatever "it" is happen. It probably won't happen overnight. Trust me, my space is always a work in progress, so chip away a section at a time. If you try something and it isn't the right fit, it's okay to chuck that idea and start over. :)
So you ready to share your organizing tips and/or your Spring Has Sprung creations? Goody, goody! I can't wait to see what you've got!!!